Thursday, December 8, 2011

Biscuits & Gravy

Sometimes there's just nothing like a good meal. Something that 'sticks to your ribs' and satisfies you for hours during the day. With the weather turning cold, something warm for breakfast is always a nice way to start the day. But who says B & G has to be limited to breakfast?  We had it for dinner last night and I even remembered to take pictures!

1 1 lb chub of sausage
2 packets of country gravy mix
3 cups of water
1 cup of milk
2 cans of biscuits


Pour the 3 cups of water into a saucepan and bring to a boil on the stove. 


Mix the two packets of gravy mix and 1 cup of milk in a bowl. Mix until all lumps are dissolved. Set aside until water boils.


Fry the sausage in a pan over medium heat.


Pop open the cans of biscuits and place on a cookie sheet. 


Cook as per the directions on the can or 13-17 minutes in preheated oven at 350 degrees.


When water boils, add the milk/gravy packet mixture. Stir occasionaly until gravy begins to thicken. 


Add sausage to gravy and stir to combine. 

Cut 2 biscuits in half and place them on a plate. Spoon gravy over them and serve.


Variations- My teenaged daughter likes to bip her biscuits in a bowl of gravy.  What can I say? It works!

Friday, November 18, 2011

Chicken Chili

The other day my oldest daughter was at her boyfriends house. They had Chicken Chili for dinner and she liked it so much she wanted to make it for us for dinner.  I have found a few variations online, some calling it White Bean Chili, Chicken Chili Soup and a whole combination of things using those words. The recipes- call for a lot more ingredients.  This one is easy and since the weather is turning, her timing is excellent!

Chicken Chili-

3 chicken breasts with leg meat, diced
1 jar of picante sauce
1 can of white beans (Mediterranean style)
1 lb of Monterrey Jack cheese grated
1 16oz tub of sour cream
1 bag of tortilla chips or corn tortillas

1. In a frying pan, cook the chicken until done.
2. In a sauce pan, cook the beans, then add the picante sauce, 1/2 of the sour cream and 1/2 of the cheese. Stir as the cheese melts and then add the chicken.

Serve in a bowl with added sour cream on top and chips on the side. If using corn tortillas, fry each tortilla in oil until crisp, pat dry and serve as is or in smaller pieces.

Variations- You can add a can of corn and a rice cup of rice to the mix if you'd like.

Wednesday, November 9, 2011

Rice Junk

This is something my Mom used to make every so often. It never really had a name we just all called it 'Rice Junk'. Since then my oldest brother has adapted it by adding mixed veggies and whatever else, but I make it much the same as Mom always did.

2 packages of Farmer John sausage links
6 handfuls of rice
1 box, 2 packets of Lipton chicken noodle soup mix (I like the extra noodle version and even Ramen noodles work in a pinch)
I package slivered almonds (optional)

Brown and shred the sausage links in a frying pan.

Boil water in a large pot for the rice. When it is boiling add the rice.  As the rice is nearing finished, add the two packets of chicken soup mix.  When the rice has finished cooking, drain the water off using a colander.  When drained, put the rice & noodle soup mix back in the pot, add in the almonds (optional) and the sausage, stir to mix and serve. Done. Simple as that. I made this last night and the girls were all over it. It's better somehow if they 'steal' a bite from someone else's plate.

Pic's to follow later

Wednesday, October 12, 2011

Thanksgiving leftovers?

Canadians celebrated Thanksgiving on Monday. Some of them may have leftovers they aren't sure what to do with. I recently found a recipe to help with that. Of course I altered it a bit so I wouldn't have to wait until next month to make it...

Thanksgiving leftover stuffed shells.

Ingredients
  • 1 (12 ounce) box jumbo pasta shells
  • 2 cups cubed cooked turkey
  • 1 1/2 cups leftover stuffing
  • 1 (4 ounce) package cream cheese, softened
  • 1/2 cup Parmesan cheese
  • 1/3 cup mayonnaise
  • 4 cups shredded mozzarella cheese
  • 1 1/2 cups leftover turkey gravy

Directions

  1. Preheat an oven to 350 degrees F (175 degrees C). Grease a 9x13 inch baking dish.
  2. Fill a large pot with lightly salted water and bring to a rolling boil over high heat. Once the water is boiling, stir in the shell pasta, and return to a boil. Cook the pasta uncovered, stirring occasionally, until the pasta has cooked through, but is still firm to the bite, about 13 minutes. Drain well in a colander set in the sink.
  3. Place turkey and stuffing in food processor, and pulse until finely ground and combined. Place the ground turkey and stuffing mixture in the bowl of a stand mixer along with the cream cheese, Parmesan cheese, mayonnaise, and 2 cups of the mozzarella. Mix with paddle attachment on medium-low until well blended.
  4. Spread 1/2 cup of gravy on the bottom of the prepared dish. Stuff the pre-cooked pasta shells with the turkey mixture and place in the dish in tight rows. Top with the remaining gravy and the remaining 2 cups of mozzarella cheese.
  5. Bake, covered, for 45 minutes. Uncover and cook for an additional 10 minutes until top is browned and bubbly. Allow to cool for 5 minutes before serving.

Cook's Notes-

  • 1 - 6 ounce package of prepared instant stuffing mix can be used in place of leftover stuffing and 1 - 10.75 ounce can of cream of chicken soup can be used in place of leftover gravy.


Alterations-

I used rigatoni shells, chicken instead of turkey and cream of chicken soup instead of gravy. Stuffing the shells is a little trickier, but a teaspoon works well.

Friday, September 23, 2011

Rolled lasagna

Now that we all know how to make our own pasta and ricotta, let's put it together with a few other things for some lasagna....

I found this recipe somewhere online. I forget where, because I would gladly post a link and give them Kudos like I always do.  I love a good lasagna, but somehow layering the noodles doesn't work for everyone including me. Even laying them different directions as you go, sometimes you cut into it and stuff goes everywhere. You are left with a big pile of noodles, cheese, meat and sauce, not resembling much of anything recognizable.

Rolled lasagna-

When I make the noodles, I make the 2 egg pasta, which makes about 9 lasagna noodles. The 9 noodles will fill a 9X9 pan.   You can also place 1 or 2 rolls in separate pans for single servings- good for lunches...

Lasagna noodles, 1 package if not making your own
ricotta cheese, 8 oz if you are using store bought.
1 lb mozzarella cheese, grated
grated Parmesan cheese- optional
1 lb Italian sausage- optional
1 jar of pasta sauce

Cook the meat if you are using any, shred or crumble, drain any grease off and set aside.  Cook the noodles in boiling water until they float. I usually cook one or two noodles at a time.  Taking one out to cool, slipping another one in and going along from there until the noodles are all cooked.

Place a small amount of pasta sauce in the bottom of the 9X9 pan, this will keep the noodles from sticking when you bake.  As the noodles cool enough to handle them, place a spoonful of pasta sauce on the end of the noodle, smear it the length of the noodle if you choose. Spread some ricotta cheese on the end of the noodle, sprinkle some meat, Parmesan and mozzarella cheese on the end or full length. Roll the length of the noodle and place the roll in the pan. 

When all of the noodles are rolled and in the pan, use the rest of the sauce over the noodles. Use the remainder of the mozzarella and Parmesan to sprinkle over the top of the noodles as well. This can now either be frozen for later or baked in the oven for 30 minutes at 350 degrees.  I try to make Italian bread, garlic bread or at least bread sticks to go with this.   Enjoy!

*Edited to add- Lasagna Alfredo Roll Ups, same thing sort of, but stuffed with spinach instead and covered with alfredo sauce... I gotta try this one.  All recipes also has a few other variations- Lasagna roll ups. Turkey, tofu, veggie, southwest sausage, chicken, seafood, crab... I guess it depends on your tastes. 

Thursday, September 8, 2011

Ricotta Cheese

Now that everyone knows my recipe for homemade pasta, I will put this one up for ricotta. I haven't tried it out yet, but I hope to soon.  I found this recipe on the Smitten Kitchen back in June.

I can only imagine how much different (to read Better!) lasagna will taste with not only the homemade pasta, but also the ricotta being used... and I have an easy recipe for rolled lasagna that I will be sharing soon too.

From the SK website-

Rich Homemade Ricotta
Inspired by Salvatore Ricotta, via Tasting Table

I made this ricotta three different ways: with all milk, as the Salvatore recipe suggested (we found it a bit dry), with 3 cups milk and 1 cup heavy cream and with 3 1/2 cups milk and 1/2 cup heavy cream. Guess what? The last two ricottas were virtually indistinguishable.The extra cream did indeed add an even richer edge, but the one with less cream was also very indulgent. I imagine I’d use the richer version for toasts, for putting out at a party and the almost-as-rich one for pastas and things where I might need a larger, sturdier quantity. I’ll leave it up to you which way you go.

Makes about 1 generous cup of ricotta
3 cups whole milk
1 cup heavy cream (see Note above about using less)
1/2 teaspoon coarse sea salt
3 tablespoons freshly squeezed lemon juice

Pour the milk, cream and salt into a 3-quart nonreactive saucepan. Attach a candy or deep-fry thermometer. Heat the milk to 190°F, stirring it occasionally to keep it from scorching on the bottom. Turn off the heat [Updated] Remove from heat and add the lemon juice, then stir it once or twice, gently and slowly. Let the pot sit undisturbed for 5 minutes.

Line a colander with a few layers of cheesecloth and place it over a large bowl (to catch the whey). Pour the curds and whey into the colander and let the curds strain for at least an hour. At an hour, you’ll have a tender, spreadable ricotta. At two hours, it will be spreadable but a bit firmer, almost like cream cheese. (It will firm as it cools, so do not judge its final texture by what you have in your cheesecloth.) Discard the whey, or, if you’re one of those crafty people who use it for other things, of course, save it.  Eat the ricotta right away or transfer it to an airtight container and refrigerate until ready to use.

Serve: On 1/2-inch slices of baguette that have been run under the broiler until lightly bronzed. Serve it simply [as shown in the top photo, left to right] with honey and a pinch of flaky sea salt, a couple grinds of black pepper, pinch of salt and drizzle of olive oil, and/or a few droplets of an aged balsamic. Or with zucchini ribbons [as shown in the last photo], I started with about half a pound of miniature zucchini my mother-in-law had found at Trader Joes. Larger ones will work just fine, but you might want to first cut a big one in half lengthwise. Peel them into ribbons and toss them with 1/4 teaspoon of salt and let them drain in a colander for a while (this wilts them), about 20 minutes. Rinse and pat them dry. Toss with lemon juice, olive oil, salt and black pepper to taste. Arrange in piles on ricotta crostini.

Do ahead: I keep mine only 3 to 4 days; the really fresh milk I used doesn’t last long. However, Salvatore also uses really fresh milk, and theirs appears to keep closer to two weeks. In conclusion? Shelf lives will vary. Use your nose to judge freshness. Or your partner’s nose, because who doesn’t like hearing “Hey honey, sniff this for me?”

Tuesday, August 16, 2011

I scream, you scream

We all scream for Ice Cream!!!!  Especially when it is hotter than HELL like it has been here in Aridzona.  So why not go for something cool, cheap, and tasty?

First of all a shout out to Andrea for sending this one over. Your timing on this one is Awesome! since we were away showing and no time to be cooking or making anything...

One ingredient? I know it sounds crazy, but that's it.  Frozen bananas...
From the website in case you cannot access it-
Choose two bananas- not too ripe
Peel the bananas, cut them into 'coins'.
Set them on a plate and freeze them for 1-2 hours. 
Put them into a food processor or blender.
Blend on high.
Initially it will look crumbly, and it will stick to the sides. Keep scraping it down into the blades and eventually it turns into....
creamy ice cream!
Now is when it is recommended to add, chocolate syrup, chocolate chips, peanut butter, milk (if you want it creamier) cinnamon, nuts, honey, hazelnut cocoa mix- the options are endless. It is the texture of soft serve, but says you can freeze it in an airtight container for the standard, harder ice cream. In the comments someone else suggested adding cottage cheese (?), mango's and even alvacado.
I am looking forward to trying this one soon...

Monday, August 8, 2011

Lotsa Pasta...

A while back on another blog, I posted a pasta recipe I had found in the newspaper several years ago.  Last night I made Chicken Alfredo from the recipe I had posted here before.  The only thing that would have made it better- home made pasta of course!  It is really easy to make and the taste is definitely worth it. 

One egg pasta and variations

One egg - 2 servings
3/4 cup semolina flour
1 egg
1/2 Tablespoon olive oil
1 or 2 teaspoons of water or milk

Two egg- 3-4 servings
1 1/2 cups flour
2 eggs
3/4 Tablespoon oil
2-3 teaspoons water or milk

Three egg - 5-6 servings
2 1/4 cups flour
3 eggs
1 Tablespoon oil
3-4 teaspoons water or milk

Mix flour oil and egg(s) in a bowl or mixer until it has a course, crumbly look like corn meal. Add water or milk 1/2 teaspoon at a time until the mixture starts to hold together.

Switch to the dough hook on the mixer or knead by hand.Knead in mixer 7-10 minutes. Dough should not be sticky or in separate pieces. Add liquid if separating, flour if sticky.

If kneading by hand, turn out onto a floured surface and knead for 7-10 minutes. Cover with plastic wrap and let rest for 15-30 minutes. (Now is a good time to get out the pasta machine and set it up)

Set the pasta machine to the widest opening and roll out a ball of dough a little larger than golf balls. Roll through pasta machine to make a thick oblong shape. Fold in half and run through again. Repeat 3-4 times then roll out to the desired thickness.

Let dry as you roll out each ball of dough. Lightly flour the sheets of pasta and run them through the blade attachment. (*if you choose, if making lasagna noodles, cut them to size and let them dry.)

Hang the strips on a pasta rack , floured surface or cooling racks to air dry. (*I like to let them dry overnight if possible. Lasagna noodles definitely overnighters.)

To cook, be sure the water is at a full boil. Fresh pasta cooks very quickly and floats when done. Drain in a colander, but do not rinse. Because pasta will continue to cook after it's done, be careful not to overcook. 
___________________________

Variations

I make the two egg version and get 9 pasta noodles- good for rolled lasagna in a 9 X 9 baking pan.

I use a full Table spoon of oil (vegetable works just as well as olive) and a Tablespoon of milk right out of the gate.

When I let the dough rest, I don't cover it. Did the first few times, haven't since- no differences, so don't waste the plastic wrap.

I hang my pasta over the metal cooling racks- turned on their sides. Just the right height to get noodles on both sides.
Once dried, the noodles can be stored in a plastic bag until you use them.  I will be making some lasagna noodles soon and making rolled lasagna, pics and all to post here.... I also found a homemade ricotta recipe. I think I will post that one next, then make the lasagna.  Good stuff and rarely any leftovers... 

Thursday, August 4, 2011

Pizza, calzones & snack sized treats

I have this recipe for pizza crust that is super easy. Which is why I love it. No need to wait for the dough to rise, just mix it up, roll it out and add the toppings.

3 cups of flour
1 packet or 2 tablespoons of quick rise yeast
1 teaspoon of salt*
1 tablespoon of sugar*
3 table spoons of vegetable oil
1 cup of warm water

*I have used and skipped both the salt and sugar. They are not necessary and can be left out to adjust for any dietary issues or concerns.


Combine the dry ingredients, add the oil & water. mix to form a light dough. Let it sit for about 10 minutes. Turn out onto a floured surface and knead until it is well combined. I have found this makes 2 very large pizzas with a thinner crust. If you let it sit for a little bit, the dough will rise and become thicker, yet lighter.  
-Cut up for hot pockets type snacks, this will make about 8-10 depending on the size. Maybe more, maybe less. 
-Calzones 2 giant ones.
-Personal size pizzas- 4-6 dinner plates depending on thickness.


1 jar of pizza sauce  (not sure of the size or oz, but I will add it after I check)
1-2 lb of mozzerella cheese (depending on how much you like)
package of pepperoni or other toppings to taste- ham, sausage, pinapple, green peppers, onions, black olives...


The one jar of sauce will cover both pizzas. I have used these to make pepperoni, ham & pineapple, plain cheese, or combinations.  Over the weekend I made my own Hot Pockets, type food. Easy to freeze and bring for lunch... Guess what I'm having today?


Pepperoni pizza, ham & cheddar, turkey & cheddar, roast beef and swiss...  Sliced sandwhich meat is great for this and leftover meat can be used for sandwiches too.  I rolled out the dough, used an old rack from a toaster oven or a plastic take out lid, to mark out my rectangles, cut the out with a pizza cutter, added sauce, meat & cheese to one side, fold the other side over, wet the edges, press together to seal and bake at 350 degrees for about 25 minutes.  Once cooled I put them (2 each) into zipper lock bags- $1 store- and freeze for later.  They are good hot, warm and cold I have found since our microwave is still on the fritz.


Enjoy!

Thursday, July 21, 2011

Cod with citrus & honey sauce

The other night we had fish. Cod fillets actually. I had two packages of them in the freezer and not much of an idea of what to do with them. I generally tend to slather on some butter, sprinkle with pepper, a few drops of lemon juice and bake it...  There sat the bottle of honey, next to the one lemon we had and a couple of limes. Why not make a sweet & sour type sauce? So I did. 


2 limes
1 lemon
about 1-2 tablespoons of honey (no, I didn't measure it)
2 packages of frozen Cod fillets
pepper to taste (optional)

Put the fillets in cold water in the sink to thaw.
Preheat the oven to 400 degrees or as instructed on the fillet packaging. 
Cut the lemon and limes in half, squeeze the juice from them into a small bowl.
Add the honey as you stir with a fork to combine. 
You can add in the pepper if you choose.

When the fillets are thawed, place them in a baking dish. I used a 7x9 dish. Pour the lemon, lime, honey juice/sauce over the fillets.  There should be plenty to cover some of the fillets. Bake for 9-11 minutes or as instructed on the fillet packaging.

I made green beans to go along with the cod and on the back of the cod packaging there was another recipe suggestion (which I wrote down and will share because it sounds good and I want to try it!) that also suggested serving with green beans. 

Quick, simple and the juice/sauce? Gave the cod a delightful kick.


***Edited to add-> I brought the last two fillets to work for lunch. They had been sitting in the citrus honey sauce all night and morning.  All I can say is WOW! Much better than it was night before!  If you can, let the fillets sit in the marinade for a few hours or even overnight before baking. ***

Friday, July 15, 2011

Muy Bueno!


One last dish with the shrimp and I will find something else for a while. We had recently 'found' a restaurant nearby a tack shop we used to go to a lot, over the Christmas holiday a few years back. It's also conveniently located near one of the equine clinics....

They had sour cream enchiladas with either shrimp or chicken. I had them on a few different occasions. Both were equally as good. Then the restaurant changed hands and was back under old ownership. One visit and the food was just not as good. Completely lost all the appeal and flavor. I was on a mission to find a way to make my own enchiladas.

Which I did on All Recipes.

Sour Cream Enchiladas

Ingredients
  • 2 skinless boneless chicken breasts, cut into 1-inch cubes
  • 1 1/2 cups shredded Cheddar cheese
  • 1 onion, chopped
  • 12 (10 inch) flour tortillas
  • 1 (10.75 ounce) can condensed cream of chicken soup
  • 1 (3 ounce) can chopped green chilies, undrained
  • 1 (8 ounce) container sour cream
  • 1/2 cup shredded Cheddar cheese

Directions

  1. Preheat an oven to 350 degrees F (175 degrees C).
  2. Heat a large skillet over medium-high heat. Place chicken breast into skillet and cook and stir until no longer pink in the center, about 10 minutes. Divide chicken, 1 1/2 cups Cheddar cheese, and onions evenly among the tortillas then roll up each tortilla and place seam side down in a 9x13 inch baking pan.
  3. Heat the cream of chicken soup and green chilies in a saucepan over medium heat. Stir in sour cream. Continue stirring until heated though, about 10 min. Pour sauce over tortillas and sprinkle remaining Cheddar cheese on top. Bake in the preheated oven until sauce is bubbling and the Cheddar cheese is melted, about 25 minutes.               

As usual we made some adjustments-

Doubled everything but the chicken and cheese
1 package of precooked shrimp, thawed and cut in half
1 lb of pepper jack cheese, grated
a fair amount of lemon zest

The shrimp & pepper jack makes up one part of the enchiladas, chicken & cheddar the other. The color of the cheese helps determine which enchiladas you are eating if someone doesn't like chicken or shrimp... (See the first pic above) These freeze well and making a few pans of enchiladas for another day or even a party, is not a problem.


First one made it out of the pan...

The picture on the website shows black olives, but I didn't see them in the ingredients. I'm sure you can add them if you like. 


on the plate...

I also use a flat pan to warm the tortillas making them more 'flexible' when rolling. Also spooning in a thin layer of sauce before putting enchiladas in the pan, helps keep them from sticking later on.   If using corn tortillas, you can layer them like lasagna noodles. Some parts of Mexico- this is how they make their enchiladas. 

Friday, July 8, 2011

He sells sea shells,

Down by the seashore...


I recently found a recipe that I have to admit is Divine. It is something that I will make again and again because the first time around? It tasted like something you would order in an expensive five star restaurant. It was THAT GOOD!  Even my picky teen aged daughter who doesn't think she likes shrimp- ate this and asked for seconds. This was one of the other recipes I had bought the shrimp for.


Kevin's Sea Shells

I read all of the reviews, the way people had tweaked it for their own tastes, decided how I would tweak it for my family's and gave it a try.  I am Soooooo glad I did! The flavors stood alone as well as blending together, complimenting the others beautifully.

Ingredients
  • 1 1/2 pounds large shrimp, peeled and deveined
  • 1/2 cup sour cream
  • 3/4 cup shredded Swiss cheese
  • 36 jumbo pasta shells
  • 1/4 cup butter
  • 1 cup sliced mushrooms
  • 1/2 cup chopped green onions
  • 1/4 cup all-purpose flour, sifted
  • 1/4 cup white wine
  • 1 teaspoon salt
  • 1/2 teaspoon ground black pepper
  • 2 cups half-and-half cream  (*note here- 16 oz carton = two cups)
  • 1 cup freshly shredded Parmesan cheese  (*8 oz pkg if buying it pre-shredded/grated)

Directions

  1. Fill a pot with water, bring to a boil, and reduce heat to a simmer. Cook the shrimp in the simmering water until they turn pink and opaque, 3 to 4 minutes. Drain the shrimp, and cut in half; mix the shrimp, sour cream, and Swiss cheese in a bowl.
  2. Preheat oven to 375 degrees F (190 degrees C). Lightly grease a 9x12-inch baking dish.
  3. Fill a large pot with lightly salted water and bring to a rolling boil over high heat. Once the water is boiling, stir in the pasta shells, and return to a boil. Cook the pasta uncovered, stirring occasionally, until the pasta has cooked through, but is still firm to the bite, about 13 minutes. Gently remove the shells with a slotted spoon. Stuff 18 shells with about 1 1/2 tablespoon of the shrimp mixture, place them in the prepared baking dish, then cover each stuffed shell with another shell to enclose the filling.
  4. Melt the butter in a skillet over medium heat. Cook and stir the mushrooms and green onions until the mushrooms give up their juice, about 3 minutes. Stir in the flour, white wine, salt, pepper, and half-and-half cream. Cook, stirring often, until thickened and smooth. Pour the sauce over the stuffed shells. Sprinkle the top with Parmesan cheese.
  5. Bake in the preheated oven until the cheese has melted and begun to brown and the sauce is bubbling, about 25 minutes.


Alternatives-
I used the frozen cooked shrimp- saved time. Thaw under cold water and cut in half.
Skipped the mushrooms- I just don't like them. Instead I used fresh spinach, rinsed, chopped it up and added it before pouring the sauce on. It gave it some color, another added flavor and is my serving of veggies. Broccoli would work too.
I also skipped putting a shell on top and instead, I loaded them up and made twice as much. There was plenty of 'stuffing' and sauce for all of it.

Tuesday, July 5, 2011

Vietnamese Salad Rolls

I found this recipe on the Gourmet Slueth website recently and since I love the lettuce wraps at PF Changs, I figured why not give it a whirl?  There are of course recipes online for their lettuce wraps and I have one of them printed out of course... But the appeal for me with these? They looked light, COOL! (which can be a bouns in our heat) and tasty as well as being something NEW!


I have been in a slump lately, getting tired of the same old food, dished up over and over.  I have been looking for new things to try, different things and if it is simple to make, cheap, goes a long way and easy- I'm definately in!

A couple of weeks ago I bought the frozen shrimp for a couple of other recipes, and a few other things that cross over into other dishes as well. That's the beauty of some of these recipes and kind of why I chose them. You can buy one thing that you use in three or four different dishes. Definately keeping the cost down, use the stuff up before it goes bad and the dish as well as the flavors are diverse. 

Here is the recipe from GS- for those who choose not to go over and have a peek or for some reason can't.

Ingredients
8 ounces fresh raw medium shrimp, deveined and tails removed
8 large round rice paper wrappers
8 ounce package rice vermicelli noodles, cooked according to instructions
1 large carrot, julienned thinly
3 tablespoons thai basil, chopped
3 tablespoons fresh mint leaves, chopped
3 tablespoons fresh cilantro, chopped
4 leaves romaine lettuce, chopped
1/4 cup chopped peanuts
½ cup San-J Thai Peanut Sauce

Instructions

Prepare vermicelli, set aside.

Prepare all vegetables and place on a tray for easy assembly of the rolls.

In a small saucepan, poach the shrimp until pink throughout. Drain and cool.

Cut each shrimp in half lengthwise and set aside.

Fill a large bowl with warm water. Dip one wrapper in the warm water for 10 seconds to soften. Drain the wrapper of excess water and place in flat on a cutting board.

In a row across the center of the wrapper, place 2 shrimp halves, a handful of vermicelli, carrots, basil, mint, cilantro, and lettuce, leaving about 2 inches uncovered on each side. Top with 1/8th of the chopped peanuts. Fold the uncovered sides inward, then tightly roll the wrapper. Repeat with the remaining rolls to make 8 rolls total.

Heat the San-J Thai Peanut Sauce, if desired, by placing the sauce in a microwaveable bowl and heat on medium for 1 minute.

As with any recipe there are variations to be made. I skipped the carrots- didn't have any this time. I forgot to add the basil, left the mint as a side to add if you like and skipped the peanut sauce. I also skipped the rice paper wrapper (couldn't find any) and used a head of lettuce in it's place- obvious in the picture...  Instead I threw in some green onions since they were handy (on the window sill) and used soy sauce.  
 
I also chopped everything up before cooking the noodles. Chopping it all up was the most time consuming part of the dish, but we all know- good things come to those who wait and this is definately one of those things worth the effort and waiting for!

Friday, July 1, 2011

Green Olive Burgers

Since it is the eve of the Fourth of July weekend, I figured this would be a good time to put this one up.

A couple of years ago on the radio, they were talking about a hamburger contest. The winner was a unanimous decision by the judges. Their burger had a unique flavor that made it stand out above the rest. The judges loved it but couldn't quite pin down what it was that set this one apart from the others.  So they asked the contestant what exactly they had put in their burgers?


Diced green olives.


Simple as that. About a half small jar of olives will go far enough on a 3 lb chub of ground beef to make 6 or 7 hefty burgers. 

Admittedly, I don't like green olives. You won't find me munching on a jar of them on any given day. They are for the most part-safe from being eaten in our house.  Their counterpart, the black olives? Better have a can for each of us and step back... They don't stand a chance!

I remember I used to eat green olives. My Dad used to like them too. He and I would eat them like no tomorrow. One day that changed for me and forget it. I lost the appeal for their flavor. Hearing they were the secret ingredient though, I knew their taste and thought about it. Who knows, it might be good?

 
*I forgot the cheese*

I tried it once before and Oh my. They are good.  The green olives give the burger enough of a funky kick to put it over the top in my book too. So for the low price of a jar of cheap green olives, slice their little bad selves up and mix them in with the meat this weekend. You may just be surprised. The olives aren't just for your martini's. 

Tuesday, June 28, 2011

Move over Stouffers!

I have to admit, I like the Stouffers Chicken Alfredo.  But their idea of Family Size, just doesn't work for us anymore...  Who decides those small portion sizes are adequate?  Here you will find Family Size is enough to feed our family of 5 (the twins are nearly 3 and eating well when they want to) with leftovers for 2 people for lunch the next day.

After a while I find the stuff in cardboard boxes, starts to taste about as bland and appealing as the packaging. Yuck! I recently started looking for simple things, recipes I can make at home that taste good.

I have a recipe for making your own pasta and will be posting it soon. I think adding that extra element of home made, would make this even better than it already is. But for now, here goes.

The sauce is simple and actually a recipe I got out of the booklet that came with my pasta machine.

8 oz or one box of cream cheese          
1 stick of butter                                    
1/2 cup of milk or cream                     
1/4 cup grated Parmesan cheese          
salt & pepper to taste                            

This is for 8 oz of pasta.  Might be good for a single person or a couple, but not a family unless it is a side dish.

Most of the boxes of pasta I find are 16 oz or 1 lb. So here comes the substitutions and alternatives...

2 boxes of cream cheese
1 stick of butter (2 sticks is too much)
1- 1 1/2 cups of milk (I tend to "eyeball it" sometimes) Half and half works too.
salt & pepper to taste.
1/2 cup Swiss cheese (It was all I had at the time) About 1/4 of a 1 lb block, grated. Half a block (8 oz) is too much.


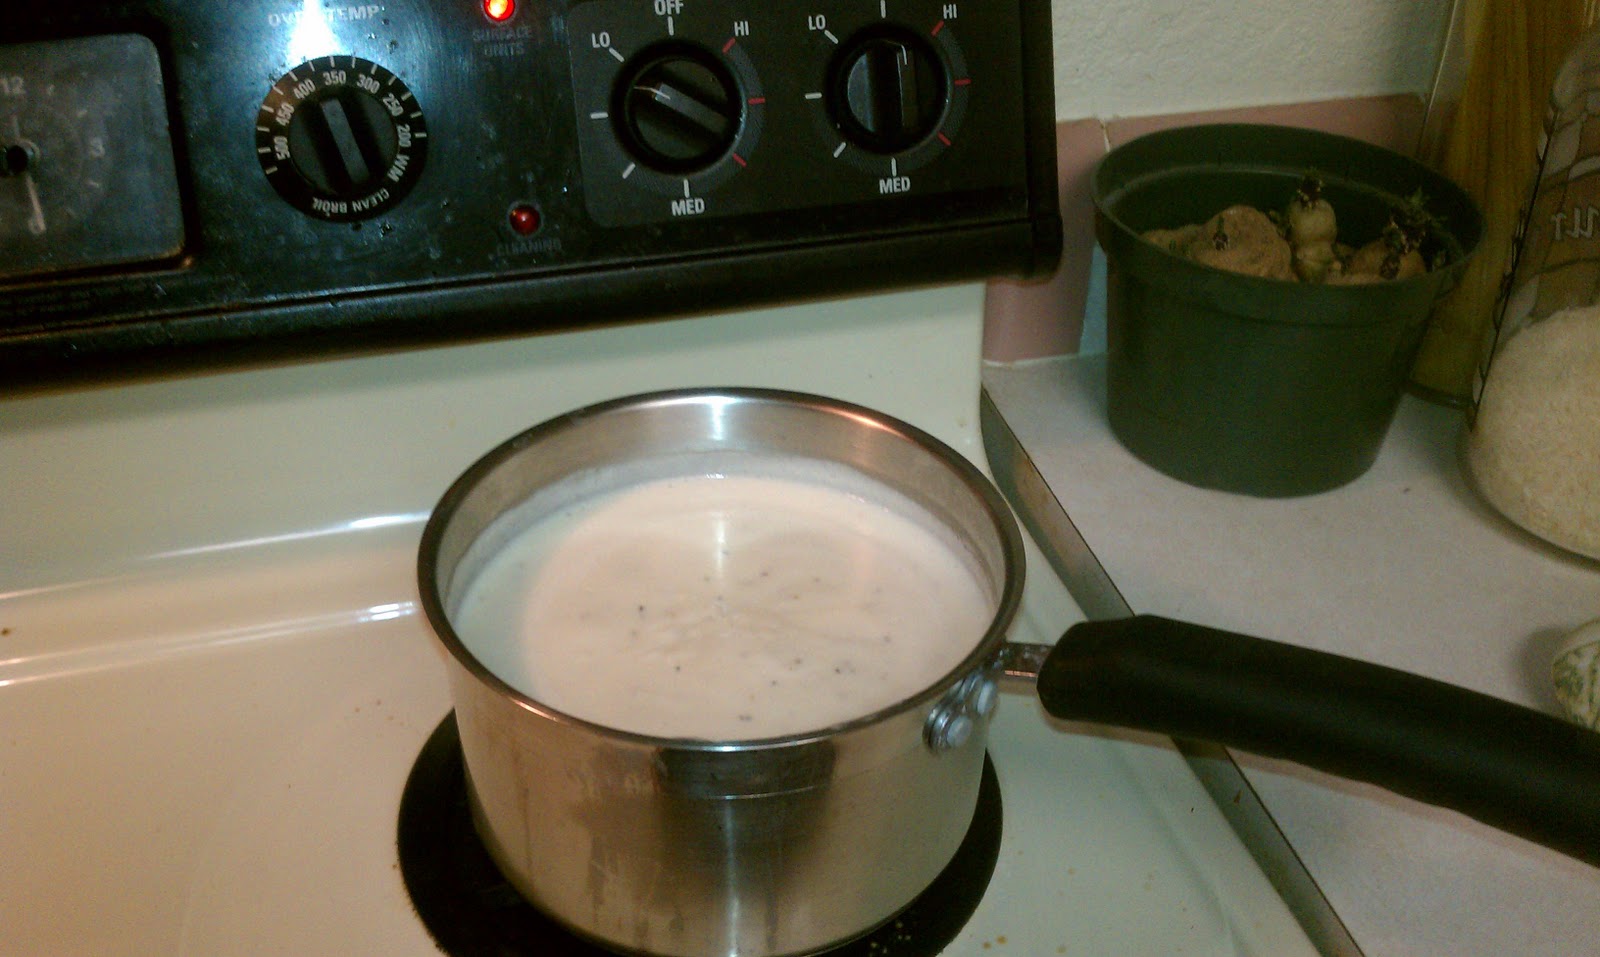
Let the cream cheese and butter sit out and soften, or you can put them in a pan on low heat to speed up the process and help it along... as it begins to melt and blend together add in the milk, grated cheese, salt & pepper.  How easy was that for Alfredo sauce? 


Cube and cook a package of chicken. 


Boneless, Skinless chicken tenderloins is a cheap cut that will go far this way. I found it for just under $4 at the grocery store. 


When the chicken is nearly done, boil the pasta, draining when done.


Combine the chicken, pasta and sauce in a 9 x 13 baking dish. If it is still hot, serve it up.


Otherwise you can cover and freeze this for later. 


When ready to heat and serve- cook it in the oven set on 400 degrees for about 20 minutes, pull the pan out and stir to ensure even cooking. Put back in for another 15-20 minutes or until it is nice and bubbly. Enjoy!

Next time I make this- I will be adding some chopped fresh spinach. It will bring some color and add a vegetable. Broccoli would also work for this.

Cream cheese is a staple at our house. An 8 oz box is $1 or $1.25 for the store brand at the local grocery. I buy a bunch of it whenever we go if my reserves are getting low...

Butter- I used to buy the big tub of country crap. Not any more! Now it is unsalted butter, 4 sticks, generic brand $2-$3 a box. You can freeze butter with no issue. Same thing I stock up when I can catch it on sale.

Cheese- Store brands, on sale- best bet.

Pasta- same thing, store brand, on sale unless making your own...

Monday, June 27, 2011

Drinks anyone?

First thing off, I have to say, a very easy and tasty summer drink is a can of pineapple juice, (usually under or around $2) a couple of bananas (those on the counter about to turn brown...) and a few handfuls of ice- thrown in the blender and whirled to your cold creamy delight...  makes a really fast, cheap and easy round of drinks. The ice and fruit makes it wonderful for summer.  Call that my two daily servings of fruit. Stick a cherry on top and make it three!

If you want to add some coconut rum or vanilla ice cream, oohhhhhh it just gets better. Or you can skip the rum and add the flavorings instead.  That's what I'm talking about... High today here is 116 degrees.   See you near the blender, by the pool or under the nearest fan.

Friday, June 24, 2011

Kicking things off

Everyone likes good food. We all get sick of the same things over and over.  In searching for new recipes, I am going to share what I find.

If anyone has a recipe they would like to share or would like me to test out for them- drop me an email and let's hear it!